Alright, ladies and gentlemen! I've spent long enough sucking the information out of this place; it's about time I add something of my own! This is a modification I made to accommodate the Viking Bags cruise large slant bags:

These bags require the rear turn signal to move. I received the viking turn signal relocation kit for free with the order. It is very basic:
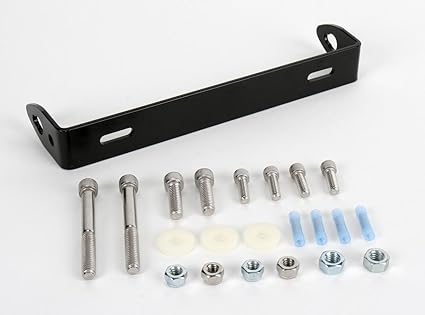
The primary things you need from this kit are the bracket and small hardware. I did not have to extend ANY wires. Here is everything I used:
-Adhesive (Gorilla, Elmer's Glue-All, JB Weld)
-2 M10 flat washers
-2 "Lamp Nipples"
-2 Nuts with the same thread as your lamp nipples - in this case 1/8 IP
-2 stock LS650 turn signal rubbers
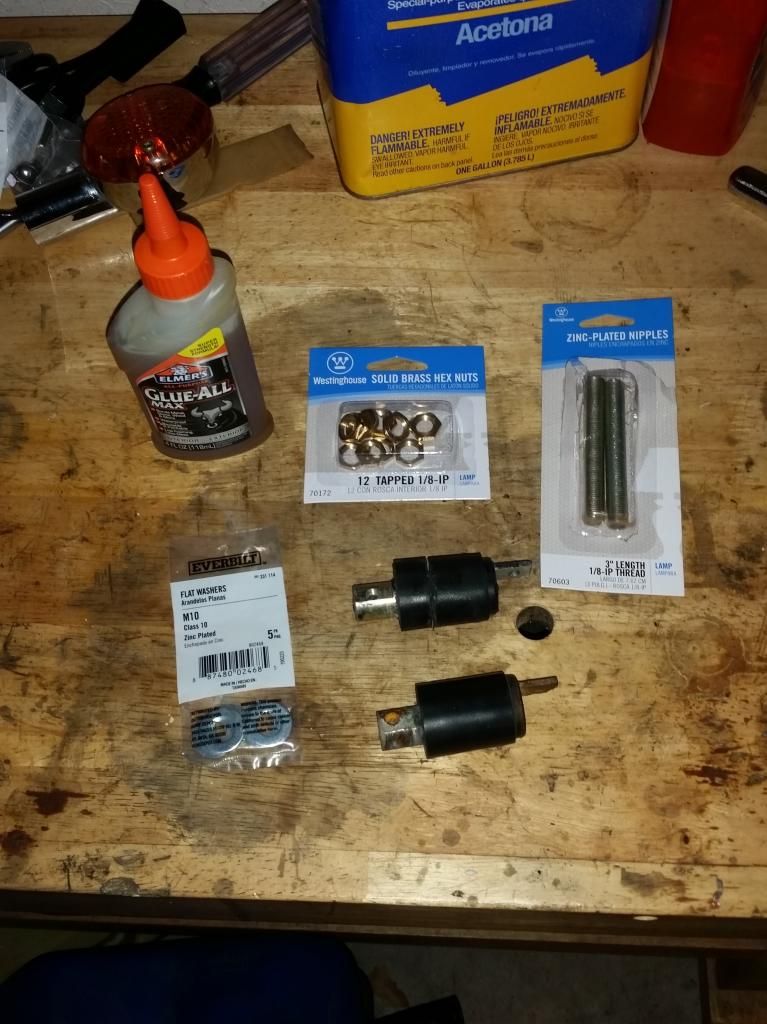
I used lamp nipples to be able to run the wires through the middle. This was the only hollow threaded rod I could find. For whatever reason it's threaded using IP threads, so I used the brass hex nuts designed to be used with these rods.
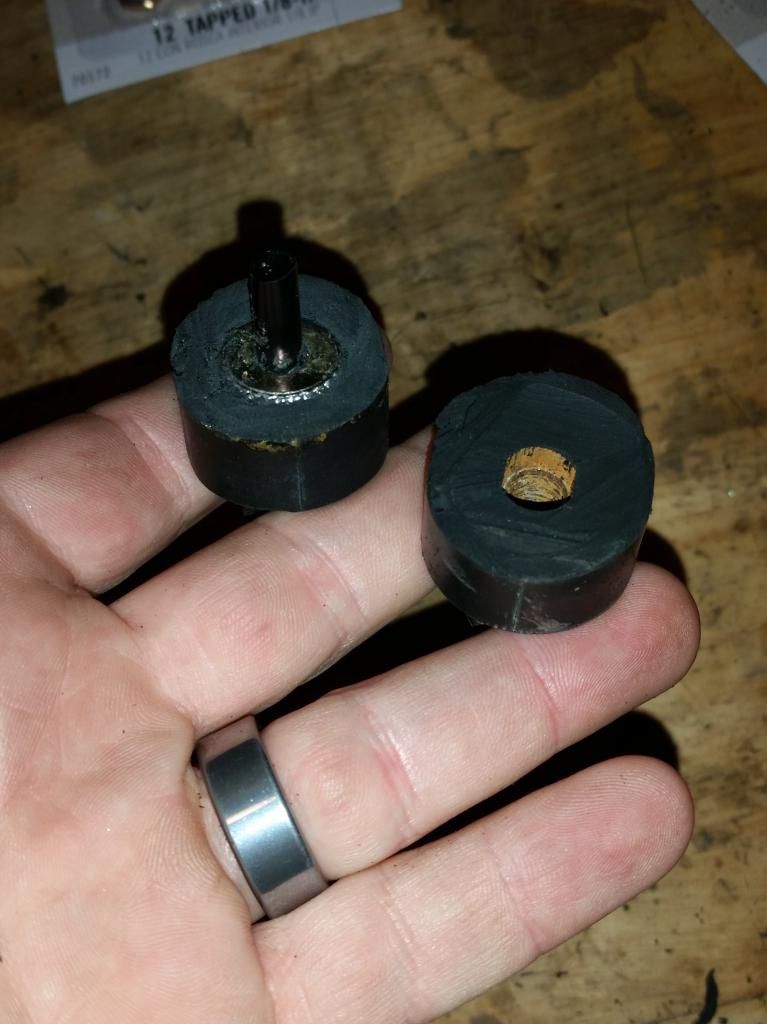
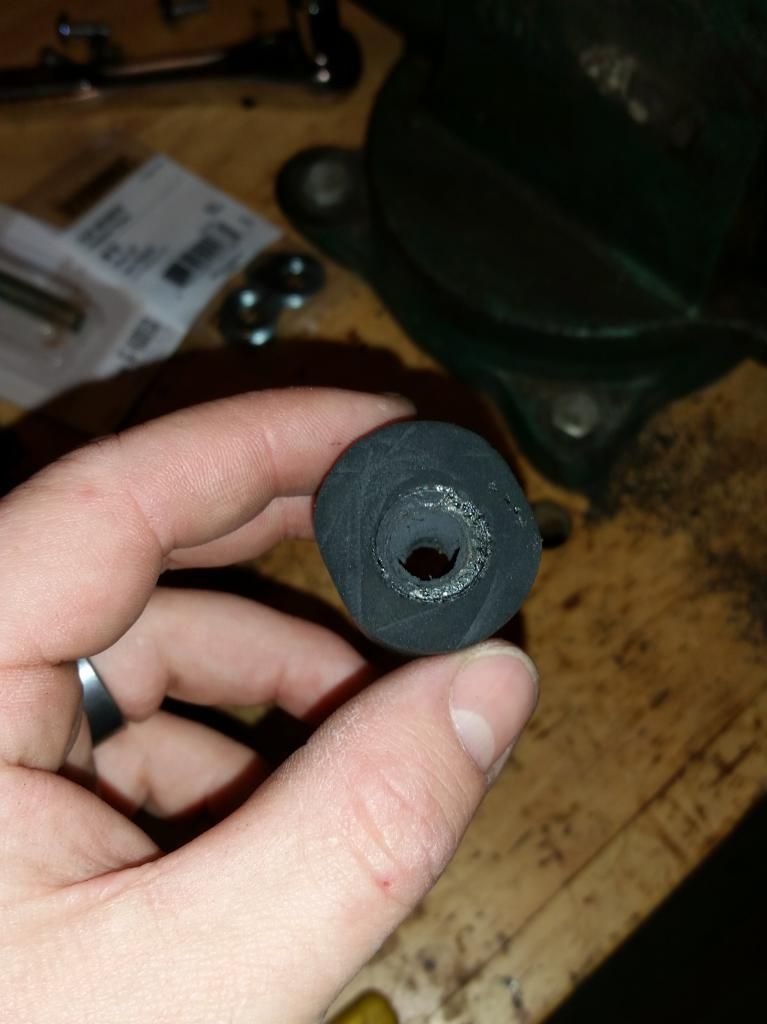
Step 1: Measure and cut your rubbers. Measure approx 14MM/0.5in from the end that screws into the side rail. Cut this off.

Pay no attention to that piece of wire wrap. It was glued to my rubber during a prior crack repair.

An interesting note: One of my rubbers is from my '01, but the other is a replacement from an older savage. Not sure of the age, I got it from WD. There is a minor design difference internally. The newer style has metal right up to the half inch point:
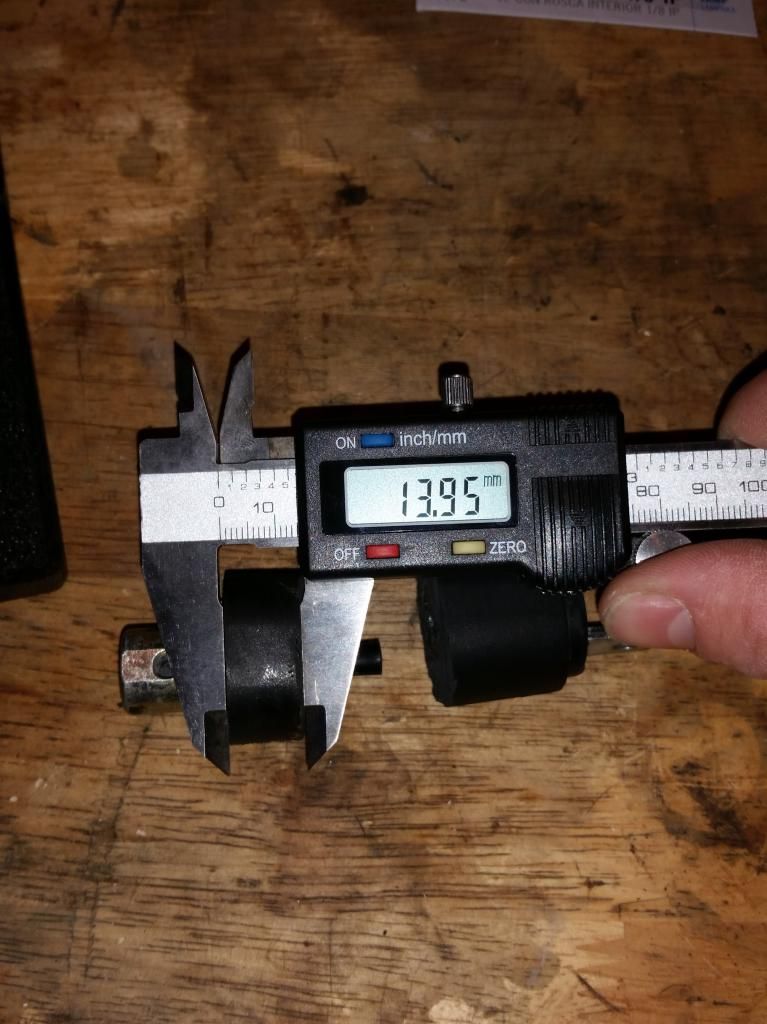
The threaded rod measures 9.74mm in outer diameter. Sounds like we need a 3/8" hole!

Step 2: Drill a 3/8" diameter hole approximately 1/2" deep into this end of the rubber:
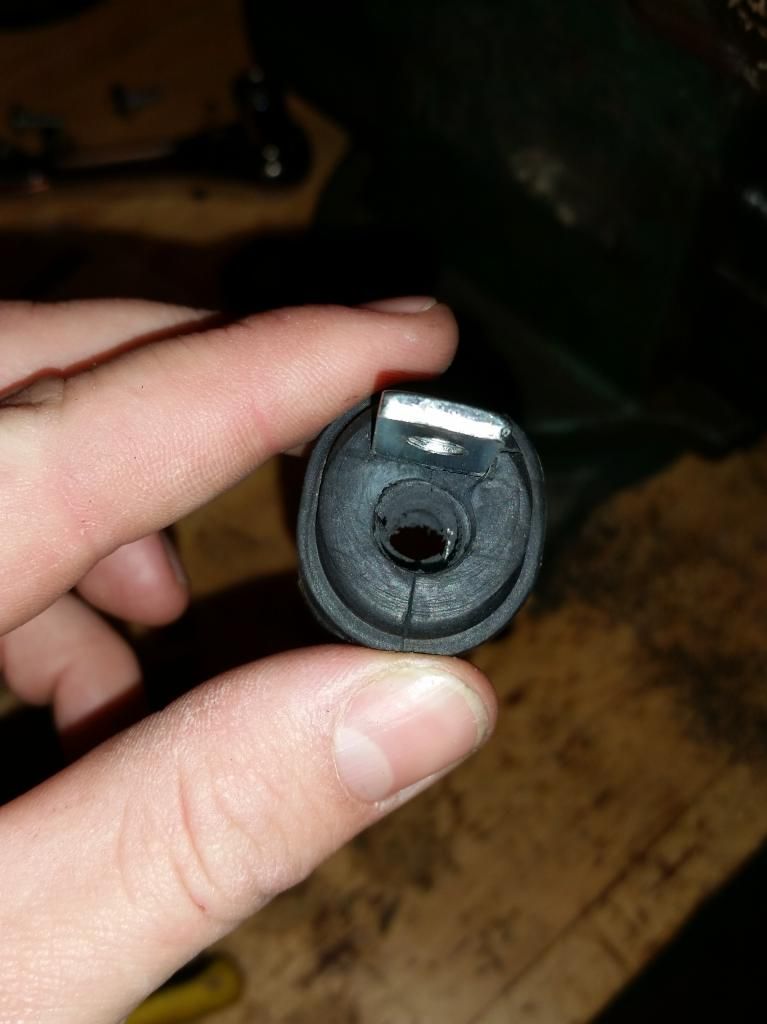
Do NOT go too far! On both styles, the metal bracket towards the signal body wraps around the hole. A 3/8" drill will be just big enough to catch that and twist it hard. That's how I did this:
Here you can almost see the hidden enemy:
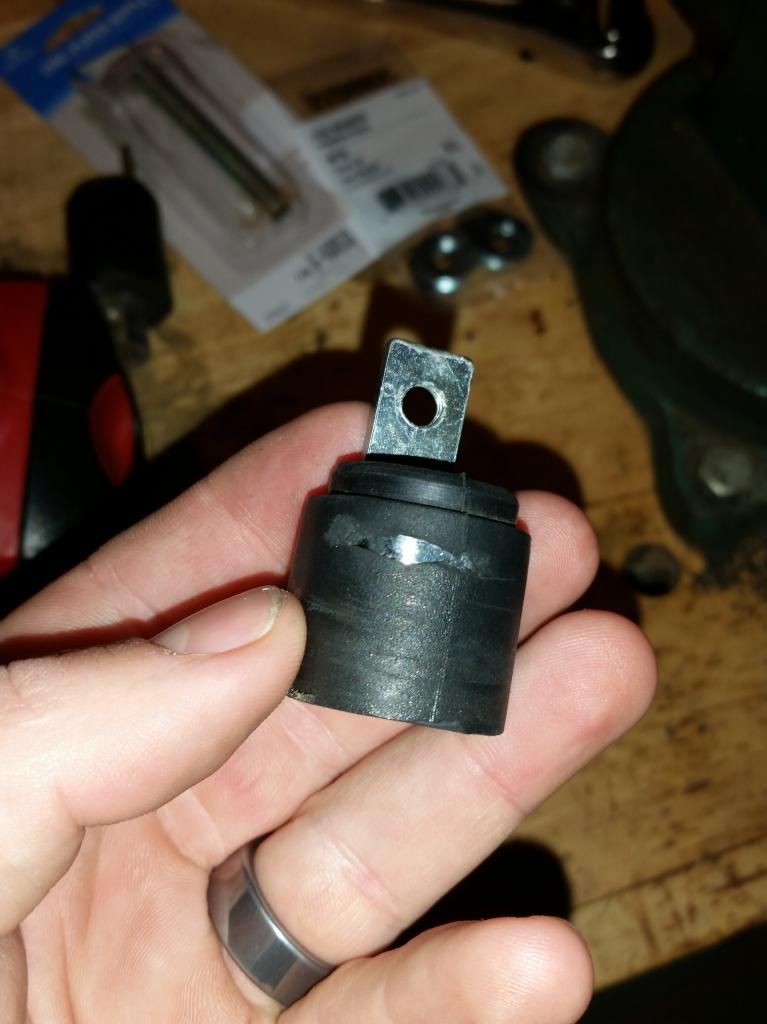
Step 3: Measure and cut your threaded rod to a length of just over 1" I didn't realize to do this until I was almost done.
Step 4: Prep your rubber hole and glue the rod using your favorite adhesive. I have one side being held by JB weld, the other by Elmers Glue-All.
Put it in the hole the right way!


Step 5: While you're waiting for the glue to set on your new stems, There are a few things you can take care of. The wiring will now be routed through the same tunnel as the brake light. With all of these wires, the grommet will need a little bit of trimming. I just used a sharp utility knife to take away some of the bulk. Maybe you'd be fine omitting it, but this it how I did it.

Step 6: You can also use this time to put your bracket onto our license plate. I positioned my bracket between the actual license plate and the bike's mounting bracket. I used the turn signal relocation kit mounting hardware here since it had locknuts. Just the right size.
Step 7: Have a beer and come back tomorrow.

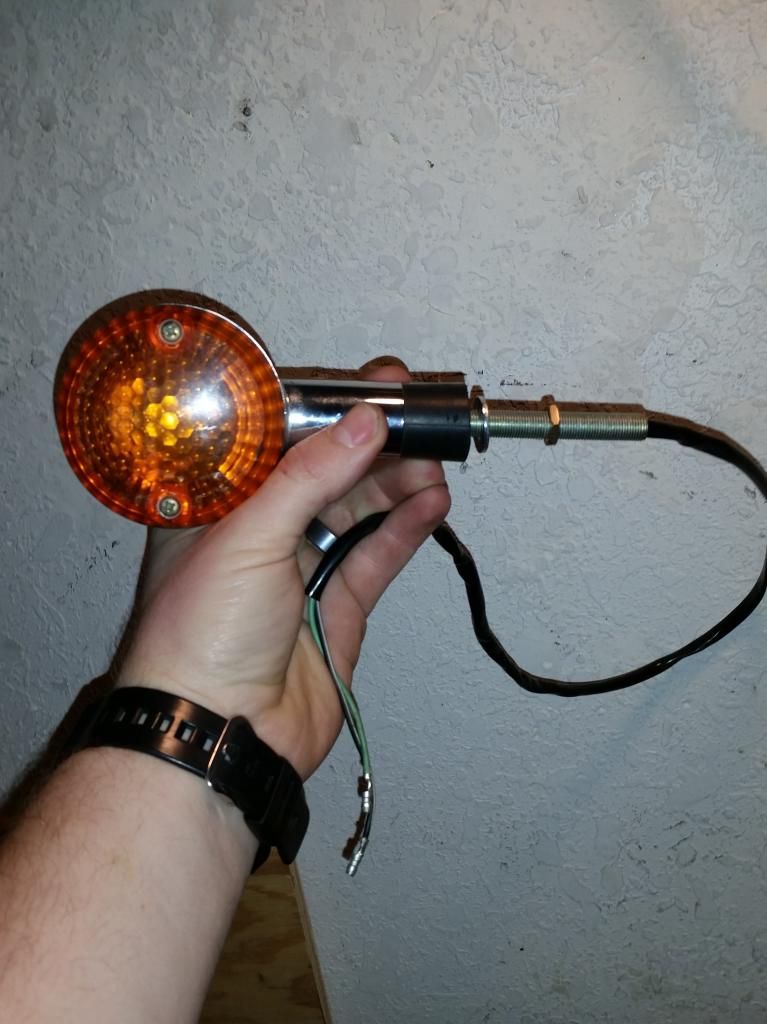
Step 8: Assemble your turn signal. It should look something like this, but with a shorter stem:
Step 8: Well, go ahead! Put them on the bike already! I just eyeballed mine and aimed them in the same general direction, aiming barely upwards. I used some blue threadlock just to be safe. I was originally worried that the brass nuts would strip easily without holding a proper torque. However, I tried to overtorque these and the first thing to let go was the Elmers glue! I re-adhered with JB weld, let it set, and tested it again the net day. I was able to substantially squish the rubber without ever stripping the nut. It holds nice and tight, and in the 200 miles I've ridden since, everything has held well.
This is what the finished product ought to look like:

I hope you guys enjoyed this! I also made my own saddlebag brackets using a different method than I've seen here. I might post that later this week.

As promised, a cute puppy! Somehow Delilah made it into my upload folder.


 Pages: 1

